Automation has become a cornerstone of modern business processes, helping organizations streamline operations, reduce manual effort, and increase overall efficiency. UIPath, as a prominent tool in robotic process automation (RPA), enables organizations to automate complex tasks with ease. On the other hand, SpreadsheetWeb provides a powerful way to transform Excel spreadsheets into robust APIs. By integrating these two platforms, businesses can automate calculations and retrieve results dynamically, using the logic from their existing Excel models.
In this guide, we will take you through the process of setting up UIPath to interact with the SpreadsheetWeb API. Specifically, we will automate the process of sending dynamic inputs to the API and retrieving calculated values. By the end of this guide, you will have a fully functional UIPath workflow that sends a request to the API, processes the response, and outputs the results.
To Begin with: Transforming Your Excel File into an API with SpreadsheetWeb
Before diving into the technical details of integrating the SpreadsheetWeb API with UIPath, it’s essential to understand the core component: your Excel file. This file forms the foundation of your API, as it contains the input fields, calculations, and output results that the API will use.
For the purpose of this guide, let’s assume you have an Excel file with the following structure:
- Three individual input fields (originZIP, destinationZIP, weight).
- An output field (cost), which is generated based on the input values through pre-configured Excel formulas.
This Excel file operates like a typical Excel calculator, but once converted into an API, it will allow you to programmatically submit inputs and retrieve calculated results—just as if you were using the spreadsheet manually.
Uploading Your Excel File to SpreadsheetWeb Hub
To turn your Excel file into an API, you’ll first need to upload it to SpreadsheetWeb Hub. The Hub is where you create an application from your Excel file, transforming it into a web-based API. This process converts your Excel formulas and calculations into a format that can be accessed programmatically through API calls.
Once uploaded, you will be given essential details that are critical for making API requests from UIPath. These include:
- API Endpoint URL: The unique URL where API requests will be sent.
- Workspace ID: The identifier for your workspace within SpreadsheetWeb.
- Application ID: The specific ID of your application that corresponds to your Excel file.
- Authentication settings (if applicable): Whether your API requires token-based authentication or not.
These details will be crucial when you configure your HTTP request in UIPath to interact with the API.
For a detailed walkthrough on creating an API from a SpreadsheetWeb application, you can refer to the documentation provided by SpreadsheetWeb. This will guide you through each step of the process, ensuring that your Excel file is properly converted into an API.

SpreadsheetWeb API Authentication Options
When setting up the API, you have two main authentication options:
- Token-Based Authentication: This is the more secure option. It requires sending a Bearer token in the request headers to authenticate and authorize the API calls. This method ensures that only authorized users can access the API.
- No Authentication: This is a simpler option, often used during the development phase or for internal testing where security is not a primary concern.
In this guide, we will proceed with No Authentication to keep the setup straightforward while integrating with UIPath. Without authentication, you won’t need to configure authorization headers, which simplifies the process. However, for production use, we highly recommend enabling token-based authentication to safeguard your API against unauthorized access.
If your use case requires additional security, you can enable token-based authentication through SpreadsheetWeb. When using this option, you would need to set up UIPath to include the Bearer token in the Authorization header of the HTTP request, ensuring that your API calls are authenticated.
Step 1: Setting Up Your UIPath Project
Start by launching UIPath and creating a new project. Once inside the UIPath interface:
- Navigate to the Studio section and select New Project.

- Choose the Manual Automation template, as we are going to manually configure API calls and workflows.
- Name your project appropriately and open the workflow editor.
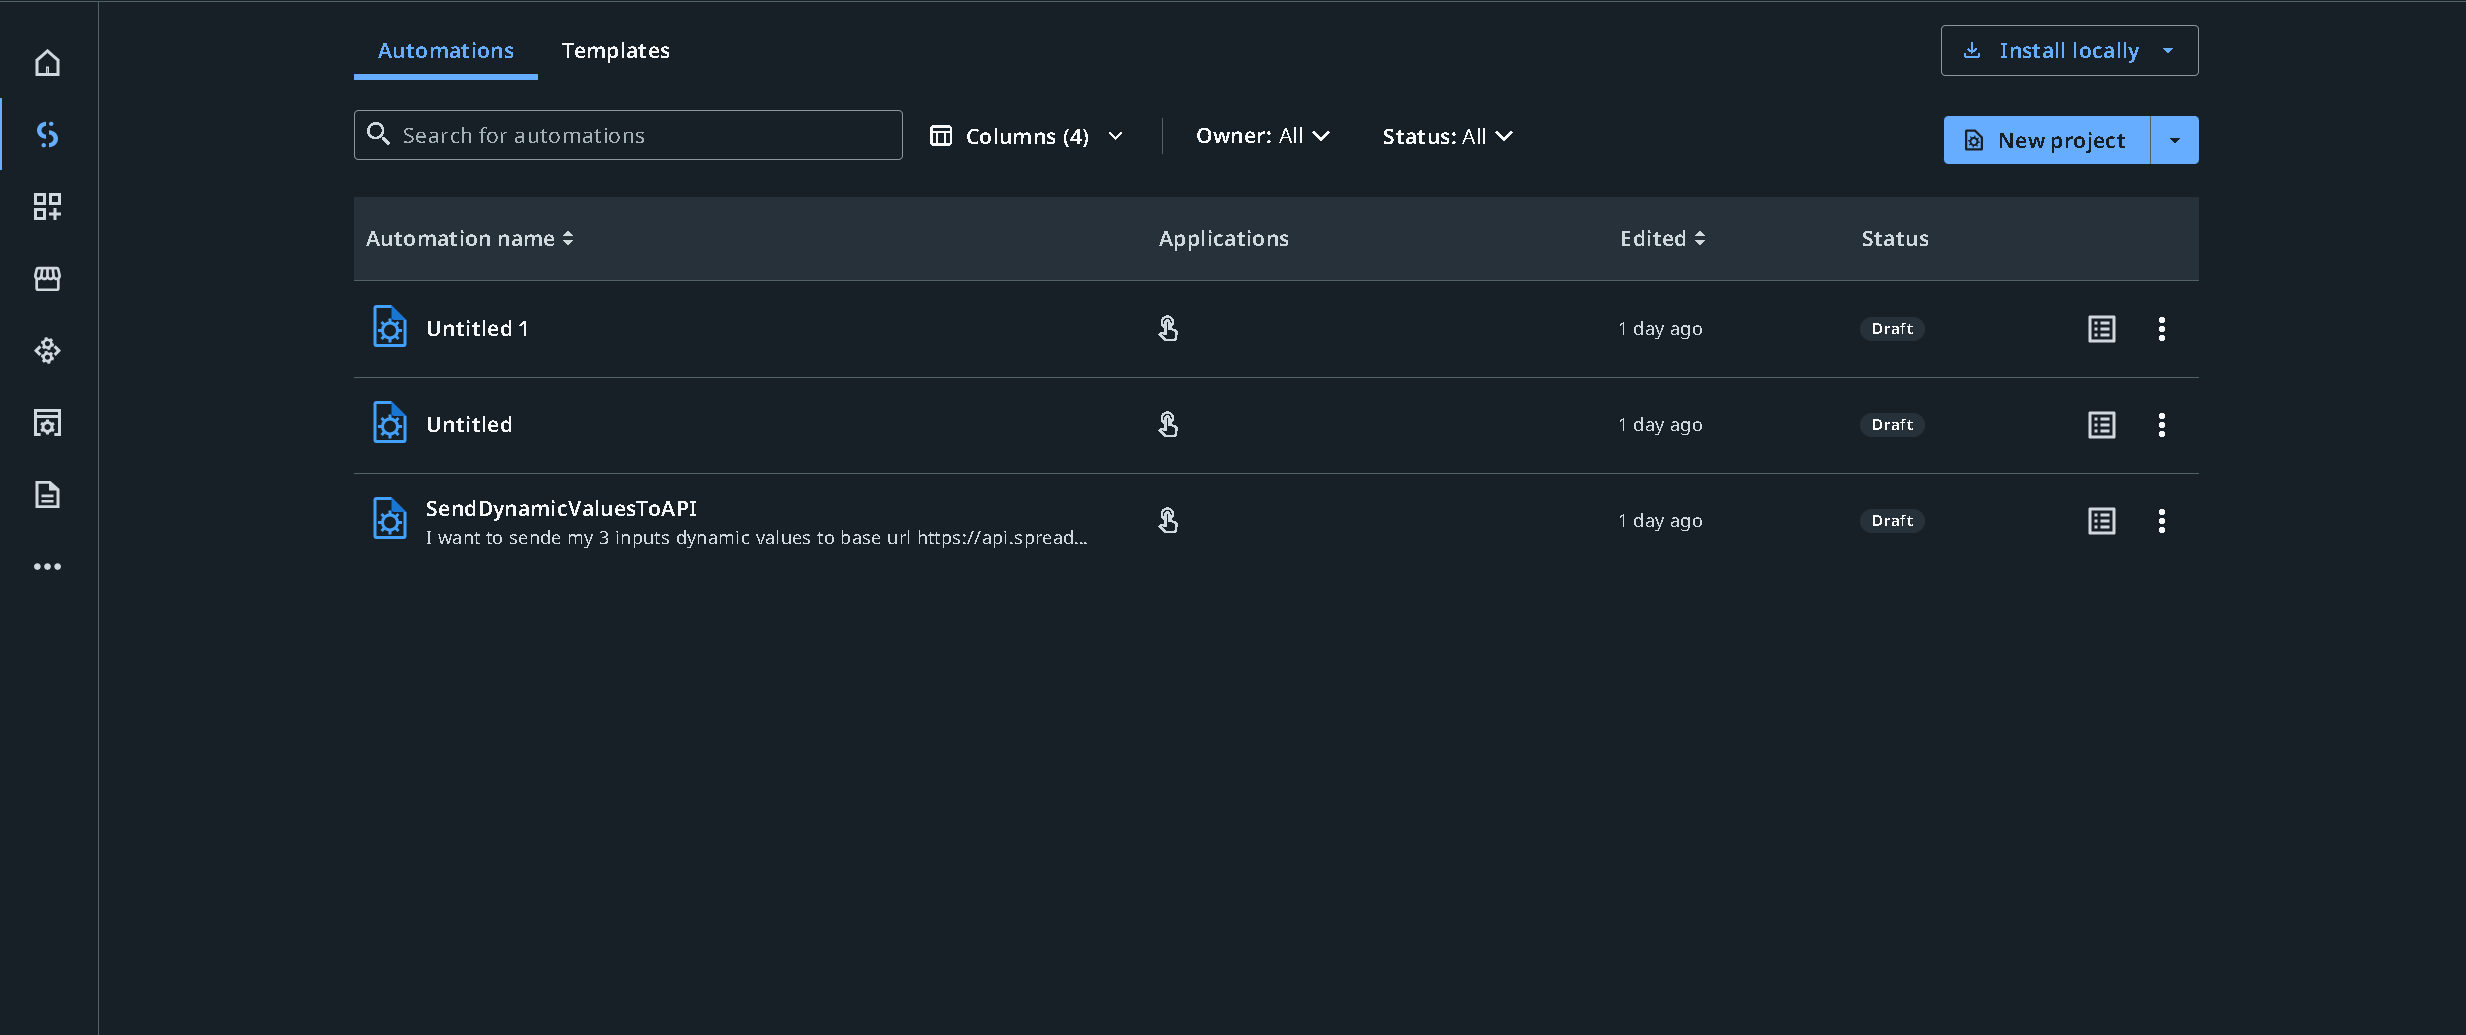
In the editor, you will be able to define your entire automation process, from handling inputs to sending requests and processing the output.
Step 2: Creating Input Variables in UIPath
In this scenario, you need three key input variables: originZIP, destinationZIP, and weight. These represent the information you will send to the SpreadsheetWeb API to calculate the shipping cost. To create these dynamic variables:
- Drag three Set Variable activities into the workflow.
- For each activity, define the variables:
- Name one variable originZIP.
- Name the second variable destinationZIP.
- Name the third variable weight.

- Leave the Default Value field empty for all three variables, as the values will be provided at runtime.
These variables will store the data entered during the execution of the automation, which will later be sent to the API.
Step 3: Constructing the API Request Body
With the input variables defined, the next step is to build the request body that will be sent to the API. The request body needs to include the values of originZIP, destinationZIP, and weight, structured according to the API’s requirements.
Here is the JSON structure required by the SpreadsheetWeb API:
{

  "request": {

    "workspaceId": "3bae377c-12fb-4b5e-90d2-a29aa12a6d79",

    "applicationId": "f8da5ff3-26dd-473c-9331-e43322e923ed",

    "inputs": {

      "originZIP": "{{originZIP}}",

      "destinationZIP": "{{destinationZIP}}",

      "weight": "{{weight}}"

    },

    "outputs": [

      "cost"

    ]

  }

}
In this JSON, the placeholders {{originZIP}}, {{destinationZIP}}, and {{weight}} represent the dynamic variables that you’ve created. To ensure that these values are properly injected during runtime:
- Add a Set Value activity and name it something meaningful (e.g., requestBody).
- Assign the JSON structure to this variable, making sure to map the input variables (originZIP, destinationZIP, weight) correctly.


This request body will be sent to the API to calculate the shipping cost based on the inputs provided by the user.
Step 4: Configuring the HTTP Request to Call SpreadsheetWeb API
Now that the request body is ready, you need to configure the API call. UIPath’s HTTP Request activity allows you to interact with external APIs, and we’ll use it to send the request to SpreadsheetWeb.
- Add the HTTP Request activity to your workflow.
- Set the request method to POST since you are sending data to the API for processing.
- In the Endpoint field, enter the API URL:
https://api.spreadsheetweb.com/calculations/calculatesinglesimple
- Under the Headers section, add the following key-value pair:
Key:Content-Type
Value: application/json
- For the Body, reference the requestBody variable that you created in the previous step. This ensures that the JSON structure containing your dynamic inputs is sent to the API.
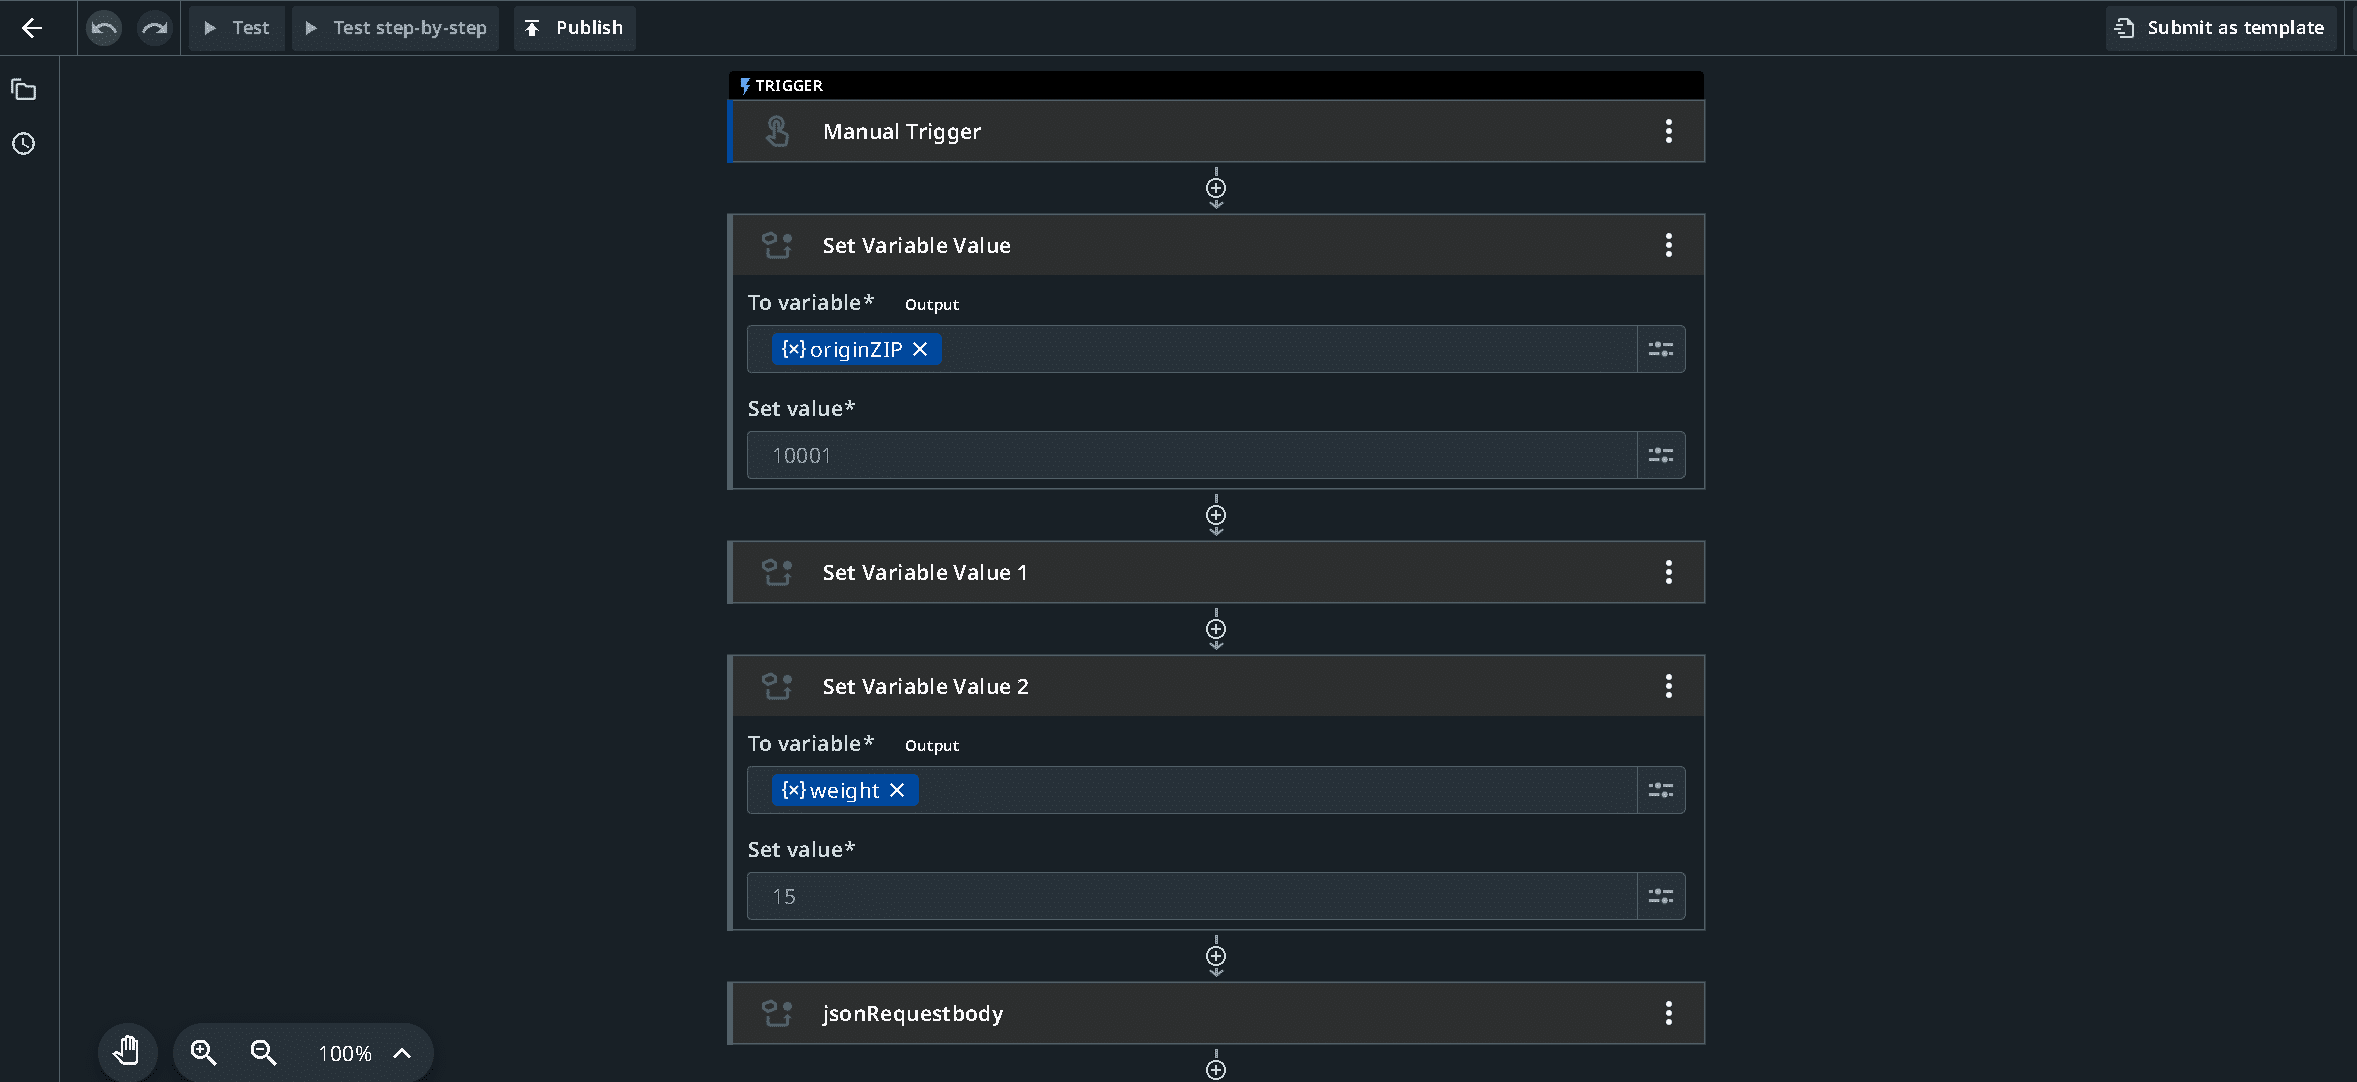
- Open the Additional Properties tab and make sure the following properties are set:
SSL Certification: Set to TRUE if the API requires SSL.
Accept: Set to JSON since the API will return a JSON response.


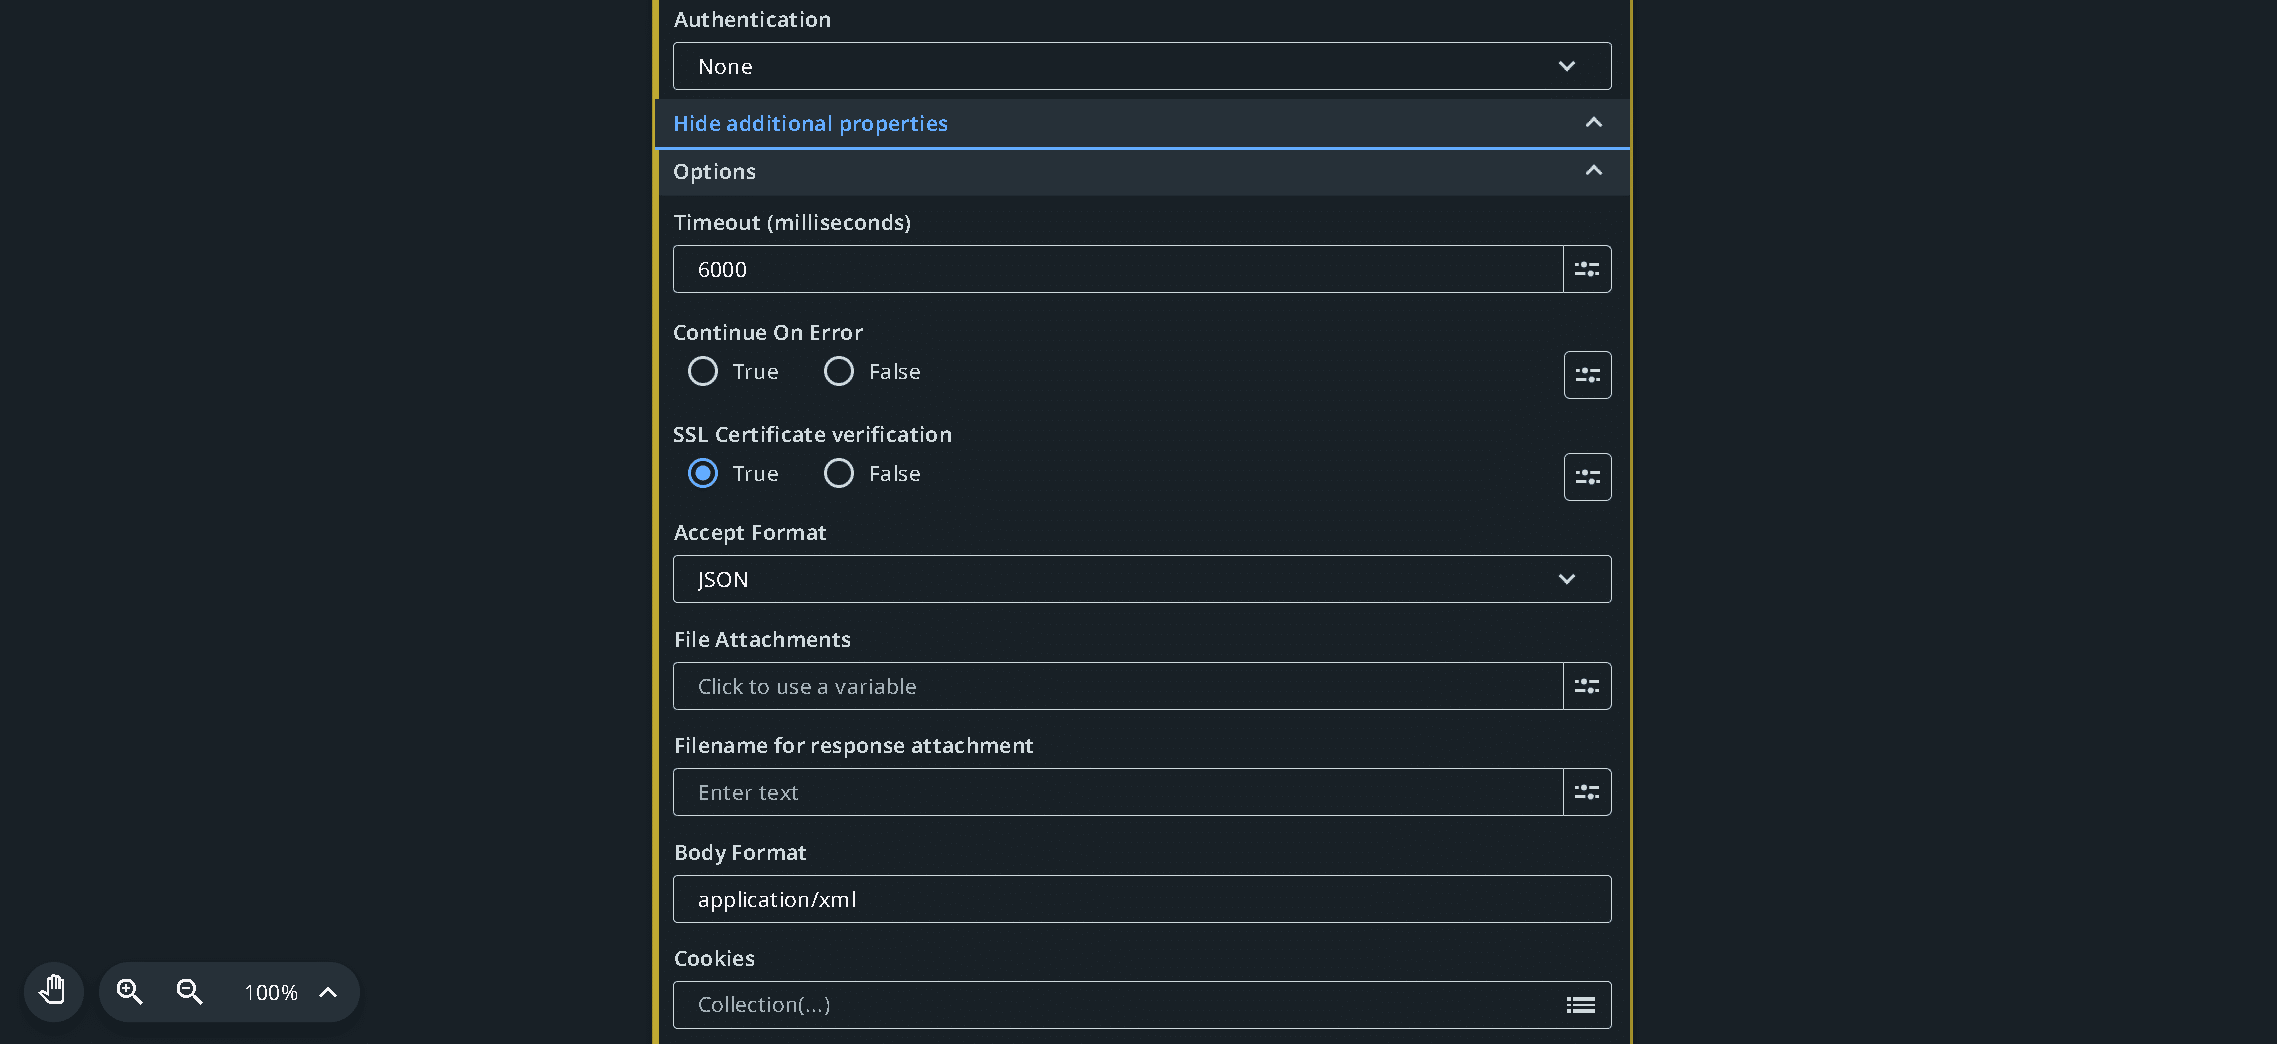
At this point, your UIPath workflow is set up to send the API request with the dynamic inputs and retrieve a response.
Step 5: Logging the API Response in UIPath Log Screen
After the API request is executed, SpreadsheetWeb will return the calculated result in JSON format. To verify that you’ve received the correct data, it’s a good practice to log the response.
- Add a Log Message activity after the HTTP request.
- Map the Response Content from the API to the log message. This will allow you to inspect the raw response and verify that it contains the correct data.
This step is crucial for troubleshooting and ensuring that the API integration is functioning as expected.
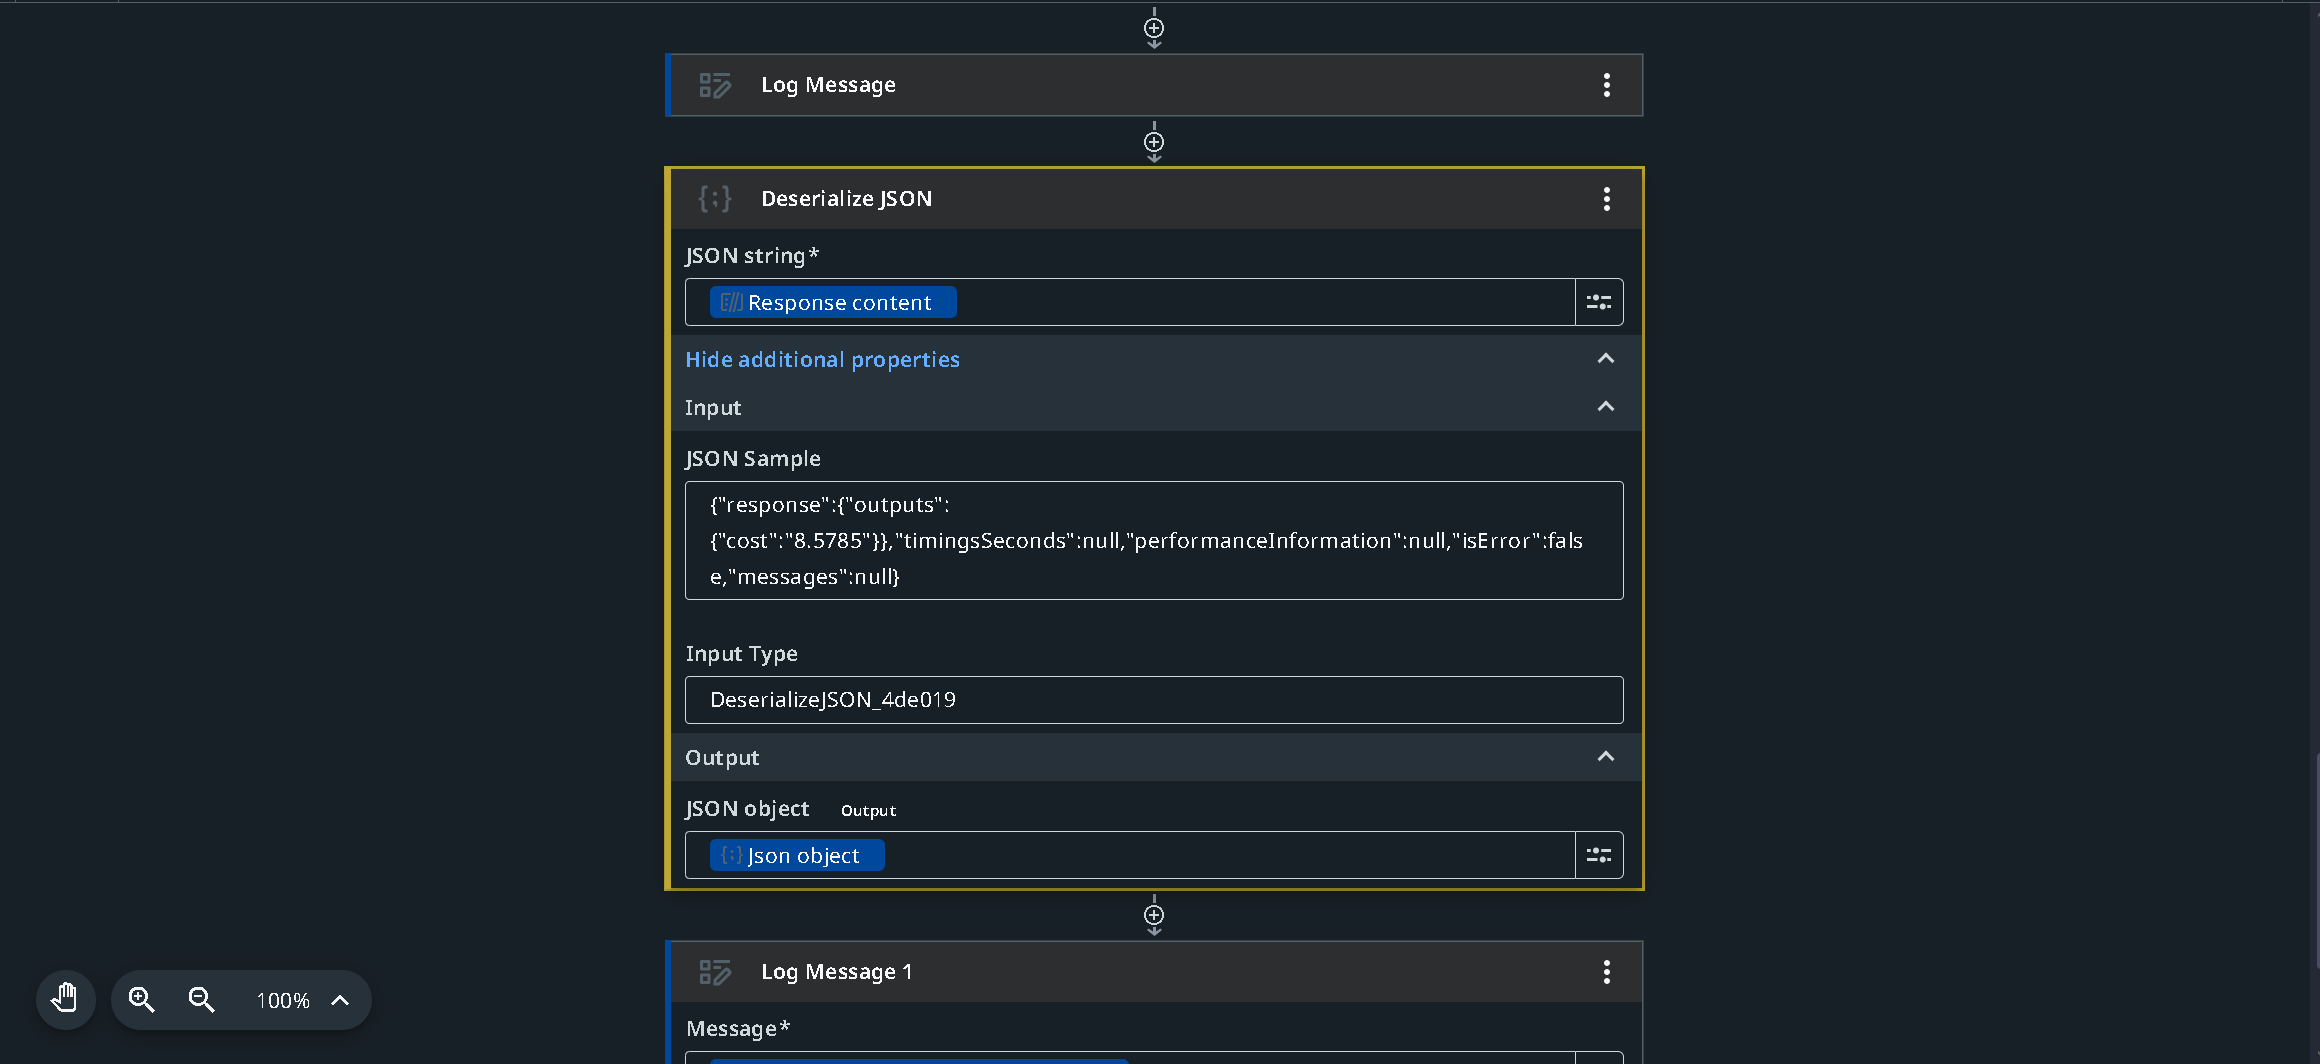
Step 6: Deserializing the JSON Response
To use the data returned by the API in your workflow, you need to convert the JSON response into a structured format that UIPath can work with. This process is known as deserializing, and UIPath provides a convenient Deserialize JSON activity for this purpose.
- Add the Deserialize JSON activity to the workflow.
- In the JSON String field, map the Response Content from the HTTP request.
- The deserialized object will be a dictionary or other structured format, allowing you to access specific fields, such as cost.
With this step, you can extract the calculated value (in this case, the cost) and use it in further steps of your automation.
Step 7: Logging the Deserialized Output
To confirm that the deserialization has worked as expected, you can log the deserialized value.
- Add another Log Message activity.
- This time, instead of logging the raw response, log the specific output field from the deserialized JSON object. For example, log the cost value returned by the API.
This ensures that the automation is correctly retrieving the calculated result and that it’s accessible for further processing.
Step 8: Testing the Workflow
Now that the workflow is fully set up, it’s time to test it. You can run the automation with different input values for originZIP, destinationZIP, and weight. For each test run:
- Ensure that the input values are passed correctly to the API.
- Check the logs to verify that the response contains the expected calculated cost.
- Confirm that the deserialized output is accurate and available for further use.

By carefully inspecting the logs and testing with a range of inputs, you can validate that the integration is functioning as intended.
By following this guide, you have now created a complete UIPath workflow that dynamically sends inputs to the SpreadsheetWeb API, retrieves the calculated results, and processes the outputs. This integration allows you to automate Excel-based calculations efficiently, eliminating the need for manual processing and leveraging the full power of automation.
This process can be expanded to include more complex calculations, additional APIs, or larger datasets, providing a scalable solution for automating a variety of tasks in your business operations.