In this article, we’re going to compare the two approaches for analyzing data in Excel, using formulas and PivotTables.
Creating a report
Let’s assume we have a spreadsheet that contains employee data, and we want to find the average base salaries by department, to create an annual report.

You can download this data set by clicking the button below.
First step is getting the department names from the table and remove the duplicate values to get a list of unique items. To learn more about finding alternative ways to find unique values see: How to find unique values Excel. Here, we’re going to copy the all Department column, paste it using the Remove Duplicates feature.

Next, we’re going to tweak our table a bit and add some formatting for a better presentation. Here are some ideas and features to utilize to create a nice-looking report:
- Sorting the department names
- Add titles
- Summarize row
- Bold characters for title and total rows
- Background colors
- Borders
- Adjusting to column widths
- Number formatting that matches the type of the data (e.g. Currency)

Finally, we can start adding the formulas. We can use references from the Department names in AVERAGEIFS formulas when selecting department names. We could also use the AVARAGEIF function, but the AVERAGEIFS function can accept more than one criteria and this is generally a better approach from a future-proofing perspective.

We used named ranges to make the formulas easier to read and manage. While Base_Salary named range represents the range that contains the base salary values, Department represents the column of department names.
The last step is adding a formula for summary calculation which will give us the averages. Dividing the sum of base salary values by the count of rows gives the average values we need.

Let's now analyze the same data using PivotTable. Begin by selecting the cell to be the top left cell of your PivotTable and click the PivotTable icon under the INSERT tab on the ribbon.

Add the reference for your data into the Create PivotTable dialog box and click OK to create your PivotTable.

Next, we’re going to add the columns we want to display and add number formatting. That’s it!

The PivotTables are very easy to create and configure. You do not need to add any formulas and data analysis features can be added directly through table controls. PivotTables add the relevant calculations automatically.

An important part of data analysis in Excel it to drill down into our data. Assume that we have to add a 2nd level of filtering to see the breakdown by states. Doing so using formulas, we need the following:
- Adding columns if there is additional content at the end of the table
- Update the format like borders, background colors and number formats.
- Repeat the copy-paste process and Remove Duplicates for the state values
- Edit the titles

Modifying the existing formulas, we will end up with the updated calculations.

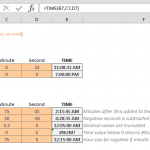
This step requires a closer attention. We must use an Absolute-Relative reference combination to preserve the calculation results. You might also want to add an IFFERROR function or conditional formatting to prevent error messages from being displayed for empty cells.

After dealing with the possible errors, once again, we need to update the formula to calculate values for the summary row. Finally, our table shows 2 levels of filtered consolidated values of our base data. Let's now see how a 2nd level of data can be added into this PivotTable.
All you need to do is drag & drop the secondary data. You can change the calculation logic or filtering with a few clicks. Filters, also known as slicers can also be added with a click.

Slicers are filters of PivotTables that can be linked multiple PivotTables and PivotCharts. You can insert any column of your data as a slicer and filter your data. If you want to do this using formulas, you need to use the controls from DEVELOPMENT tab, and update all formulas.

Other advantages of PivotTables over using data analysis formulas
- They are faster, especially with large datasets.
- Formulas can use at most 127 conditions, PivotTables can handle much more as much as memory allows.
- Easy to apply visualization options.
- PivotCharts that can visualize data are just as easy to create as PivotTables
- You can group any data field without any additional formulas.