In Excel's vast array of tools and functions, the XOR function emerges as a specialized yet pivotal feature for data analysts and Excel enthusiasts alike. This function, which stands for 'Exclusive Or,' is critical in executing logical comparisons and returning Boolean (TRUE or FALSE) values based on unique criteria. Understanding and mastering the XOR function can significantly enhance your data manipulation capabilities in Excel.
At its core, the XOR function operates on the principles of Boolean logic, a fundamental concept in computer science and digital electronics. Boolean logic deals with true or false values, and the XOR function embodies this by comparing input values (or conditions) and determining their collective truthfulness. What sets the XOR function apart is its exclusive nature of evaluation: it returns TRUE only if an odd number of the given arguments are true. The function will yield a TRUE result if the arguments contain a mix of TRUE and FALSE values but not when all are identical (all TRUE or all FALSE).
This nuanced operation of the XOR function makes it exceptionally useful in complex conditional checking scenarios. For example, in a dataset, if you need to check multiple conditions and want to ensure that they are not all the same, XOR becomes your go-to tool. It’s particularly handy in decision-making processes, data validation, and setting up specific triggers based on varied conditions.
As we delve into this guide, we'll explore the XOR function in detail, demonstrating its application through various examples. These examples illustrate how XOR can be used in practical scenarios, from simple conditional checks to more complex data analysis tasks. We'll also show how XOR can be combined with other Excel functions, like IF, to create dynamic and robust formulas. Additionally, a crucial aspect of working with any function in Excel is understanding and handling potential errors. The XOR function, while straightforward, is not immune to common pitfalls such as incorrect argument types or misinterpretation of its logic. We'll guide you through common errors and troubleshooting methods, ensuring that your experience with the XOR function is as smooth and productive as possible.
By the end of this guide, you will have a comprehensive understanding of the XOR function and the knowledge to apply it effectively in various Excel tasks. Whether you're analyzing data, setting up logical conditions, or simply exploring new Excel functions, the insights gained from this guide will be an invaluable addition to your Excel toolkit.
Supported Versions
- Excel 2013 and later
Syntax of the XOR Function
The syntax of the XOR function is relatively straightforward, yet it's important to grasp each component to utilize the function correctly. The general form of the XOR function is as follows:
This syntax consists of several parts:
- XOR: This is the function name that initiates the Exclusive Or operation.
- logical1: This is a required argument. It represents the first condition that you want to test. The logical argument can be a value, expression, or cell reference evaluated as TRUE or FALSE.
- [logical2], ...: These are optional arguments. You can test up to 254 additional conditions. Like the first logical argument, these can be values, expressions, or cell references. The square brackets around these arguments denote their optional nature.
The XOR function evaluates each argument (logical1, logical2, etc.) and returns TRUE if an odd number of the arguments are TRUE. If all arguments are FALSE or an even number is TRUE, the function returns FALSE.
- Type of Arguments: Each argument in the XOR function can be a direct Boolean value (TRUE or FALSE), a numeric value (where 0 is treated as FALSE, and any non-zero number is treated as TRUE), or a cell reference that contains either.
- Return Value: The function always returns a Boolean value, TRUE or FALSE.
- Usage in Formulas: XOR is often used with other functions for more complex logical tests. For instance, it's commonly paired with the IF function to execute conditional actions based on the XOR test results.
By understanding the syntax and components of the XOR function, you can effectively implement it in various data analysis scenarios in Excel, enhancing your ability to perform sophisticated logical operations.
Examples of the XOR Function
Example 1: Simple Logical Test
In this particular instance, we are using the XOR function to evaluate two logical tests within Excel. The formula is structured as follows:
Let's break down this formula to understand its components and how it arrives at the result:
- XOR Function: As we know, the XOR function in Excel performs an exclusive logical comparison between two or more conditions. It returns TRUE if an odd number of conditions are TRUE, and FALSE otherwise.
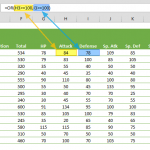
- First Condition - `84>=100`: This is the first logical test within the XOR function. Here, the formula checks whether 84 is greater than or equal to 100. Since 84 is less than 100, this condition is FALSE.
- Second Condition - `78>=100`: This is the second logical test in the formula. It checks if 78 is greater than or equal to 100. Similar to the first condition, this is FALSE because 78 is less than 100.
- Evaluating XOR: The XOR function now evaluates these two conditions. Remember, XOR returns TRUE only if an odd number of its arguments are TRUE. Both conditions (`84>=100` and `78>=100`) are FALSE. Since the number of TRUE arguments is zero (an even number), the XOR function returns FALSE.
- Result Interpretation: The outcome of this formula is FALSE, indicating that either both conditions were FALSE or an even number of them were TRUE (which, in this scenario, are both FALSE). This result is particularly meaningful in scenarios where you need to ensure that certain conditions do not simultaneously satisfy or fail a specific criterion.
This example succinctly demonstrates the utility of the XOR function in logical comparisons within Excel. XOR becomes an invaluable tool in data analysis and decision-making processes by testing whether different conditions meet or don't meet certain criteria. Understanding how to interpret its results can greatly enhance your ability to perform complex logical operations in Excel.

Example 2: Combining XOR with Other Functions
In this illustrative example, we combine the XOR function's power with the IF function and the AVERAGE function in Excel. The formula in question is:
This formula is a bit more complex, integrating multiple functions and conditions. Let's break it down step by step:
- IF Function: The outer function is the IF function. This logical function checks whether a condition is met and returns one value if TRUE and another if FALSE.
- XOR Function: Within the IF function, we have the XOR function, which is the heart of our logical test. The XOR function here is tasked with evaluating three separate conditions.
- First Condition - "FIRE, FLYING"="Fairy": This condition checks whether the string "FIRE, FLYING" is equal to the string "Fairy." This is FALSE since the two strings are different.
- Second Condition - `"I"="I"`:** This condition is comparing two identical strings "I". Since they are the same, this condition is TRUE.
- Third Condition - `AVERAGE({78,84,78,109,85,100})>=100`: This part of the formula calculates the average of the numbers 78, 84, 78, 109, 85, and 100, and then checks if this average is greater than or equal to 100. The average of these numbers is less than 100, so this condition is FALSE.
- Evaluating the XOR: The XOR function now processes these three conditions. Remember, XOR returns TRUE if an odd number of its arguments are TRUE. In our case, only one of the three conditions (the second one) is TRUE, which satisfies the criteria for XOR to return TRUE.
- IF Function's Decision: As the XOR function returns TRUE, the IF function returns the first value, "Pass." This is because the IF function is structured to return "Pass" if the condition (in this case, the outcome of the XOR function) is TRUE.
- Overall Result: the entire formula evaluates to "Pass." This example illustrates how the XOR function can be integrated with other functions like IF and AVERAGE to perform complex logical operations. It showcases the flexibility of Excel in handling intricate formulas and the power of logical functions in decision-making scenarios.

Tips on XOR Function
- Logical equations cheat sheet
| Calculation | Returns |
| TRUE XOR TRUE | FALSE |
| TRUE XOR FALSE | TRUE |
| FALSE XOR FALSE | FALSE |
-
- XOR and IF for Conditional Logic: A common and powerful combination is using XOR with the IF function. The IF function allows you to execute specific actions based on whether a condition is true or false. When XOR is used as the condition in an IF statement, it uniquely evaluates multiple conditions. For instance, you can create a formula that checks for certain criteria and returns different results based on the unique TRUE/FALSE pattern identified by the XOR function.
- Real-World Applications: This combination can be particularly useful in scenarios like data validation, where you might want to flag entries only if they meet certain exclusive criteria. For example, in a financial model, you might want to check if either of two conditions is met but not both, and based on this, the IF function can trigger specific calculations or alerts.
- Creating Complex Logical Scenarios: XOR can also be combined with other logical functions like AND, OR, and NOT to create even more complex logical scenarios. Each of these functions has its way of evaluating conditions:
- AND Function: Checks if all given conditions are TRUE.
- OR Function: Checks if any one of the given conditions is TRUE.
- NOT Function: Inverts the value of a given condition.
- Complex Decision-Making Formulas: You can build complex decision-making formulas by combining these with XOR. For instance, you might use XOR with AND to check if certain conditions are exclusively met while others are collectively met or XOR with NOT to flip the logic of a particular condition within a larger set of criteria.
- Application in Data Analysis and Reporting: These combinations are especially powerful in data analysis, reporting, and dashboard creation. They allow for nuanced checks and balances within your data, enabling you to uncover insights that might be missed with more straightforward analyses.
- Customized Logical Testing: This level of customization in logical testing is invaluable for scenarios requiring detailed and specific data scrutiny. For example, in project management dashboards, combining these functions could help identify unique scenarios where specific conditions are met for project milestones.
- Comparison operators:
| Operator | Description | Criteria Sample | Criteria Meaning |
| = | Equal to | “=10000” | Equal to 10000 |
| <> | Not equal to | “<>10000” | Not equal to 10000 |
| > | Greater than | “>10000” | Greater than 10000 |
| < | Less than | “>10000” | Less than 10000 |
| >= | Greater than or equal to | “>=10000” | Greater than or equal to 10000 |
| <= | Less than or equal to | “<=10000” | Less than or equal to 10000 |
Error Handling in XOR Function
#VALUE! Error:
The XOR function in Excel is robust and versatile, but like any other function, it can encounter errors if not used correctly. One common error associated with the XOR function is the #VALUE! Error. This error occurs under specific circumstances that are important to understand for effective troubleshooting.
What Triggers the #VALUE! Error in XOR?
The #VALUE! error in the context of the XOR function is typically triggered when one or more of its arguments do not yield a Boolean value. In Excel, Boolean values are essentially binary, representing TRUE or FALSE. The XOR function is designed to operate with these binary values. However, when an argument passed to it cannot be interpreted as TRUE or FALSE, Excel cannot execute the function properly, resulting in a #VALUE! Error.
Common Causes of #VALUE! Errors in XOR
- Non-Boolean Arguments: If you input text strings, error values, or other non-Boolean values directly into the XOR function, Excel cannot interpret them as TRUE or FALSE. For example, `=XOR("Yes", "No")` will result in a #VALUE! error because "Yes" and "No" are not Boolean values.
- Formulas or References That Don’t Return Boolean Values: Sometimes, the arguments might be formulas or cell references that we expect to return Boolean values. However, if these formulas or the data in these referenced cells are not structured to return TRUE or FALSE, the XOR function will yield a #VALUE! Error. For instance, `=XOR(A1, B1)` will result in an error if cells A1 and B1 contain anything other than Boolean or numeric values (where 0 is FALSE and any other number is TRUE).
- Incorrect Use of Comparison Operators: Often, the XOR function uses comparison operators (like `=`, `>`, `<`, etc.) within its arguments. If these comparisons are set up incorrectly or result in non-Boolean values, it will lead to a #VALUE! error.
Troubleshooting the #VALUE! Error
To resolve this error, you must ensure that all XOR function arguments are either directly TRUE or FALSE or expressions resulting in TRUE or FALSE. Here are a few troubleshooting tips:
- Check Each Argument Individually: Isolate each argument of the XOR function to check if it returns a Boolean value. This can be done by evaluating each argument in a separate cell.
- Ensure Correct Use of Comparison Operators: If you use comparison operators within the XOR function, verify that these comparisons are logical and return TRUE or FALSE.
Convert Non-Boolean Values to Boolean: If your data consists of non-Boolean values you want to use in the XOR function, consider converting these values to Boolean. For example, nested IF statements could translate specific text values to TRUE or FALSE.
Data Validation: Ensure that the cells or ranges referenced in the XOR function contain appropriate data that can be evaluated as Boolean values.
How XOR Handles Empty Cells
When it comes to handling empty cells, Excel's XOR function treats them as FALSE. This means that an empty cell is essentially considered as a zero (0) or FALSE value in the context of the XOR calculation. Therefore, if the XOR function in Excel is applied across a range of cells where some are empty, those empty cells will not contribute to the count of TRUE values. This behavior aligns with Excel's general treatment of empty cells in logical operations, where they are typically interpreted as FALSE. It's important for users to be aware of this characteristic to accurately interpret the results of XOR operations in scenarios where empty cells are involved, especially in complex spreadsheets where logical decisions are based on the outcome of such functions.