Create your HubSpot account
Your HubSpot instance can be accessed via RESTful web service calls. In order to utilize HubSpot’s API, you will need to create a developer account or utilize one of the sample accounts offered to developers.
In this example, we’re going to utilize the a sample account. You can find more information about this account type from the link below.
https://developers.hubspot.com/docs/overview
If you would like to create your own developer account, simply follow the link below instead.
https://app.hubspot.com/signup/developers/step/join-hubspot
Setting up your Project
We’re going to begin by running Visual Studio and creating a new Class Library project in C#.

Hubspot utilizes OAuth standards for authentication with their system. We will utilize the RestSharp library in order to authenticate with their server. To do so, open the Nuget Package Manager Console in Visual Studio (go to Tools > Nuget Package Manager > Package Manager Console).

Then, simply run the following command in the window to pull down RestSharp and any dependencies as references in your project.
 Install-Package RestSharp -Version 106.3.1
The Custom Code Class Implementation
Next, we’re going to add references to requisite SpreadsheetWEB assemblies. Add the following *.dll files from the package into your project as references:
Pagos.Designer.Interfaces.External.dll
Pagos.SpreadsheetWeb.Web.Api.Objects.dll

The available custom action hooks within the Designer are exposed in the external interfaces assembly. By creating a class that implements one or more of these interfaces, you can trigger execution of custom code at the following target events:
IBeforeCalculation
After the calculation request has been generated based on the application's requirements, but before the calculation request has been sent to the calculation engine. This provides for a moment to modify the calculation request before it is sent, as well as validate and cancel subsequent actions.
IAfterCalculation
After the response from the calculation has been received but before all subsequent processes, such as save, print, and email generation. This provides for a moment to modify the results from the calculation response before they are processed, as well as validate and cancel subsequent actions. This will be executed even if there is no save action associated with the button.
IBeforeSave
After the response from the calculation has been received but before all subsequent processes, such as save, print, and email generation. This provides for a moment to modify the results from the calculation response before they are processed, as well as validate and cancel subsequent actions. This will not be executed if there is no save action associated with the button.
IAfterSave
After the response from the calculation has been received and the save action has been performed (i.e. all requested save data has been stored in the database), but before all subsequent processes, such as print and email generation. This provides for a moment to modify the results from the calculation response before they are used in subsequent processing, as well as validate and cancel subsequent actions. This will not be executed if there is no save action associated with the button.
In this example, we’re going to be using the IAfterCalculation interface to push a Contact record to the HubSpot system when the user hits the submit button in the web application.

Some sample code that performs this action can be seen below:
Compile the assembly once the code is satisfactory for your scenario.

Creating your SpreadsheetWeb Application
Basic Application Creation Walkthrough
Log into your SpreadsheetWEB Control Panel and press Create a New Application.

Select Designer as the type and click Next.

Select your Excel file under the Excel Spreadsheet box and press Next after giving your application a name.

Assign your application to a group and click Next.

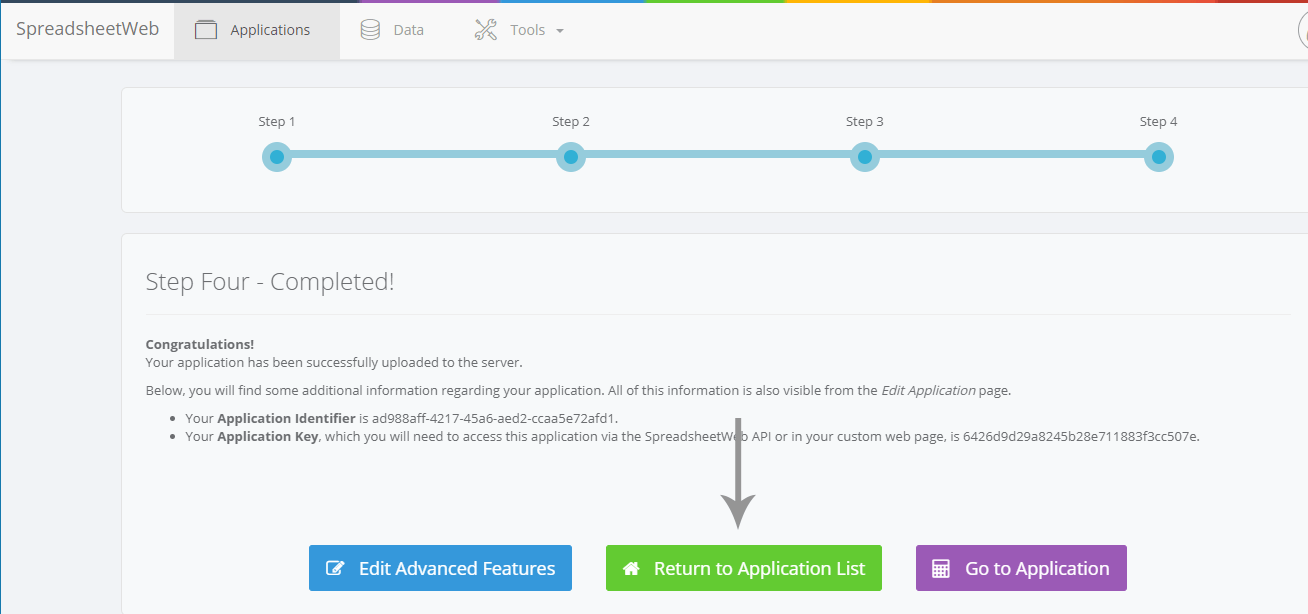
Finally, click Return to Application List to go back to the main page.
Under the Applications page, click the orange Edit Designer Application next to the application name.

This will take you to the Designer home menu.
Uploading your Custom Action for Subsequent Usage
Proceed to Custom Actions.

In the next screen, click Add Custom Action.

After giving your custom action a name, select or drag-and-drop the *.dll compiled assembly file into the Custom Action File box. Once the file upload has completed, press Create Custom Action.

You will then be able to see the custom action class and the available events that can be triggered. This page is for your information and this data will not be visible to the end user. Go to the main designer menu by clicking the Designer logo on the top left corner.

Creating your User Interface
Now, we can create a user interface and push the data into Salesforce. Go to the User Interface menu to start building the UI.

In the designer, all controls must be placed inside sections. Begin by dragging and dropping a section control into your page. In this example, we also use two textbox inputs inside of this section – drag two instances of the textbox control into the section.
Click on each of the textbox inputs to configure them. Under the Named Range dropdown, select the iName and iEmail named ranges (i.e. bind each of those named ranges against an input).

Finally, we’re going to add an action button to the page. The action button can be configured by clicking on it once it has been placed on the page. Select your custom action from the Events option.

Once you’re done, remember to press the Submit button to save your changes. You can now click on Preview in the dial menu or the right-hand properties menu to see a preview of the application.

NOTE: Most likely, unless you have performed this tutorial against your particular server already, you will likely receive an error that looks like the following upon pressing the Submit button.

This simply indicates that the system could not find the RestSharp assembly dependency that we discussed in the earlier section while compiling our project.
If you are running your own server, you can take a copy of your RestSharp.dll, either from the original package directory or from your output bin directory and copy it into your Designer’s bin directory on the server. In a default server installation instance, the target directory would be found under the following directory:
C:\inetpub\wwwroot\Designer\bin

After doing so, you will find that entering data into the form and pressing the Submit button will now submit the information to HubSpot, which can be reviewed in the HubSpot Contacts section of the platform.

Defining Named Ranges in Excel
The aforementioned iName and iEmail are named ranges that are associated with the sample workbook that was utilized to generate this application. These names correspond to a single cell in the workbook.
You can use either of the following methods to create named ranges in Excel:
Name Manager
Select the Formulas ribbon and click on the Name Manager.

Click the New button.

Define the name and use the Refers to input to point to a target cell (or series of cells).

Upper Left Cell Reference Name Field
Select the cell (or series of cells) that you would like to name. In the upper-left corner of the Excel window (below the ribbon), enter the desired name into the name field and hit Enter.