Excel Tables are a highly beneficial tool for individuals who work with data in a tabular format. These tables offer an organized and efficient way to manage, analyze, and present data. When you convert a range of data into an Excel Table, you not only improve its visual representation but also gain access to a wide array of functionalities that can greatly simplify your data management tasks, including how to sort a table in Excel. An Excel Table transforms your data into a structured format with numerous advantages. Firstly, it provides a clean and structured layout for your data, making it easier to read and comprehend. Each column in the table has a clear header, and rows are neatly organized, facilitating quick data retrieval and reference.
One standout feature of Excel Tables is their dynamic sizing. As you add or remove data, the table automatically adjusts in size, ensuring that your data remains well-organized and visually appealing. This adaptability is particularly useful when you need to work with datasets that are continually evolving. Sorting and filtering data within an Excel Table is another significant advantage. You can effortlessly arrange your data in ascending or descending order based on the values in any column. Filtering allows you to display only the data that meets specific criteria, simplifying the process of data analysis and extraction.
Consistency in formatting is maintained throughout Excel Tables. This means that font styles, colors, and borders remain uniform across your data, enhancing the overall presentation of your information and making it more visually appealing and professional. Moreover, many Excel Tables include a Total Row feature at the bottom. This feature allows you to perform calculations such as sums, averages, and more with a simple click, providing a quick way to obtain total values for specific columns in your data.
In this guide, we will focus on one of the fundamental functions of Excel Tables: sorting. Sorting data is a crucial operation in data analysis, and Excel Tables provide an intuitive and efficient way to accomplish this task.
Steps: How to Sort Tables in Excel?
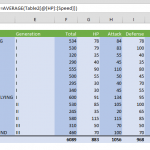
To enhance your data analysis capabilities in Excel, you can follow a series of straightforward steps to incorporate calculated columns into your Excel Tables. Calculated columns are an invaluable feature when you need to derive new values based on existing data within your table. These dynamic columns can perform various calculations, such as arithmetic operations, text concatenation, or even complex functions.
Before you proceed with adding calculated columns, it's important to ensure that you already have an Excel Table in place. If you don't have a table set up yet, you can refer to our comprehensive guide on "How to Insert an Excel Table" for detailed instructions on creating one. Once your table is ready, you can seamlessly integrate calculated columns to harness the full potential of your data.
By incorporating calculated columns into your Excel Tables, you empower yourself to perform customized calculations that meet your specific data analysis requirements. Whether you're calculating percentages, generating summaries, or performing any other data manipulation, this feature equips you with the tools needed to extract valuable insights from your data efficiently and effectively.
Now, let's dive into the steps for adding calculated columns to your Excel Tables, unlocking a world of data analysis possibilities that can enhance your decision-making and reporting processes.
Step 1: Select a Cell Inside the Column
Begin by selecting a cell inside the column you want to sort. Here, we have a couple of options to apply sorting.

Step 2: Choose a Sorting Method
Excel provides various ways to sort your data, catering to different preferences and work styles. What makes Excel stand out is its flexibility in sorting, offering not one but three distinct methods within the interface. Each method serves the same core sorting purpose, so you can choose the one that suits your workflow or personal preference. Excel is designed for user-friendliness, ensuring you can comfortably use any of these sorting methods. In essence, Excel offers abundant flexibility when it comes to sorting data, making it easy to arrange your information the way you want, including how to sort a table in Excel.
Sort By Filter Button
When you create an Excel Table, you gain access to a set of powerful features designed to simplify data management. One standout feature is the addition of filter buttons strategically placed next to the column headers. These unassuming arrow buttons are incredibly useful for both filtering and sorting your data.
These filter buttons open the door to customizing your data effortlessly. With a simple click, you can filter and display only the data that meets your specific criteria, especially handy when dealing with large datasets or searching for specific patterns.
If you don't see these filter buttons next to your column headers, don't worry – there's a solution. You can easily enable them by checking the "Design" tab in the Ribbon. Inside this tab, you'll find a checkbox labeled "Filter Button." Turning this checkbox on ensures that the filter buttons appear next to your column headers, giving you instant access to powerful filtering and sorting options.
This tip can significantly improve your data management in Excel. Having these filter buttons ready to use allows you to work with your data more efficiently, making your workflow smoother and boosting your productivity. So, if you ever can't find these filter buttons, just go to the "Design" tab and enable the "Filter Button" checkbox to make managing your data easier.
Additionally, you can apply these filter buttons to sort your Excel Table, which we'll explain shortly in this guide on how to sort a table in Excel.

Sort By Right-click Menu
The right-click (context) menu in Excel serves as a convenient and quick-access hub for a variety of operations, including sorting. When you right-click on a column header within an Excel Table, you'll discover a well-organized sub-menu dedicated to sorting options.
The beauty of this feature lies in its simplicity and practicality. Imagine you're working on a complex dataset, and you need to sort a specific column swiftly. Instead of navigating through multiple menus or ribbons, you can simply right-click on the column header of interest. As soon as you do, a context menu appears, offering you a tailored selection of sorting choices.
Within this sub-menu, you'll find a range of sorting options, allowing you to sort the data in ascending or descending order based on the column you've selected. This means that the sorting operation is localized to the column where you initiated the right-click action. It's an elegant and intuitive way to sort data, as it ensures that your sorting action is precise and targeted.
This feature not only saves you time but also minimizes the risk of sorting errors, especially when working with intricate datasets. Whether you're dealing with numerical values, text data, or dates, the context menu's sorting capabilities provide you with the flexibility and control you need to organize your data efficiently.
So, the next time you're in the midst of your Excel data analysis and need to sort a specific column, remember the power of the right-click (context) menu. With its sorting sub-menu, you have a quick and effective method for sorting data right where you need it, enhancing your overall Excel experience and boosting your productivity.

Sort By Ribbon
The Ribbon offers sorting options in not just one but two different tabs, making it a powerful resource for Excel users seeking precision and flexibility in their data management tasks.
- The Home Tab: Excel's Home tab is your go-to hub for fundamental data management tasks. Here, you'll discover a set of sorting tools that allow you to arrange your data in ascending or descending order based on the selected column. This tab caters to users who prefer a straightforward and easy-to-navigate interface for sorting their data. It's a user-friendly option for those who want quick access to essential sorting features without delving into more advanced settings.

- The Data Tab: For users who seek more comprehensive data manipulation capabilities, the Data tab is a treasure trove of advanced options. Here, you'll find a dedicated "Sort & Filter" group that not only provides sorting functions but also includes advanced filtering, text-to-columns, and data validation tools. The sorting options in the Data tab offer enhanced control and customization, making it ideal for complex data sorting needs.

Step 3: Sort Data
Regardless of the method you choose to employ—whether it's via the context menu, the Ribbon, or any other means—you'll notice that there are three fundamental sorting options that remain consistent throughout all these methods. These options serve as the backbone of your sorting activities, offering you precise control over how your data is organized:
Sort Smallest to Largest
This option is as straightforward as it sounds. When you select "Sort Smallest to Largest," Excel arranges the data in the active column in ascending order, starting with the smallest values at the top and progressing to the largest values at the bottom. It's an essential choice when you want to put your data in a natural, incremental sequence.
Sort Largest to Smallest
Conversely, "Sort Largest to Smallest" is the flip side of the coin. By selecting this option, Excel reverses the order and organizes the data in descending fashion. This means that the largest values will occupy the top positions in the column, gradually decreasing in size as you move down. It's a useful choice when you want to emphasize the most significant data points.
Sort / Custom Sort / Sort by Color (Labels may be different in different methods. However, all methods will display the Sort option.)
This option is your gateway to advanced sorting in Excel. It allows you to customize your sorting process to fit your specific needs. You can sort by multiple columns, set up custom sorting criteria, and even sort by cell color or font color, offering incredible flexibility in data arrangement. These three core sorting options are versatile and can handle a wide range of sorting tasks, whether you're dealing with numbers, text, dates, or even color-coded data. Whether your sorting needs are basic or complex, these options are reliable tools to ensure your data is organized just the way you want it.

While you can employ various methods and shortcuts for sorting, there are specific scenarios where opting for the Sort dialog proves to be the wisest choice:
- Multi-Column Sorting: Sorting isn't always confined to a single column. There are situations where you need to arrange data based on multiple columns simultaneously. This is where the Sort dialog truly excels. It offers you a comprehensive platform to specify the order in which each column should be sorted, allowing you to fine-tune your data arrangement with precision. Whether you're managing complex datasets with interdependent columns or conducting intricate analyses, the Sort dialog simplifies the process of multi-column sorting, ensuring that your data is organized exactly as you need it.
- Modifying Sorting Method: Excel provides you with default sorting methods, such as sorting in ascending or descending order. However, there are times when these default methods may not fully meet your requirements. The Sort dialog steps in as your customizable sorting wizard. It allows you to tailor the sorting process to your exact preferences. Whether you want to sort text data alphabetically, arrange dates chronologically, or sort numerical values based on custom criteria, the Sort dialog empowers you to modify the sorting method with ease. It's the tool you turn to when you need precise control over your data arrangement.
- Custom Sorting Orders: Every dataset is unique, and sometimes, standard sorting orders simply won't suffice. Excel recognizes this need for customization and provides you with the ability to establish custom sorting orders using the Sort dialog. Whether you're working with non-standard text data that follows a specific sequence or managing data with unique categorizations, you can define your own sorting order. This feature is invaluable for maintaining the integrity and accuracy of your data, ensuring that it's arranged in a manner that aligns with your specific business rules or analysis requirements.
The Sort dialog is your command center for advanced data sorting in Excel. It empowers you to tackle complex data arrangement challenges with confidence, whether you're dealing with multi-column sorting, modifying sorting methods, or establishing custom sorting orders. By utilizing the Sort dialog, you unlock a world of possibilities for optimizing your data management and analysis processes, ensuring that your Excel experience is not just efficient but also tailored to your unique needs.
See Tips for Excel Tables for further information and tips and tricks of using Excel Tables.