VBA Excel: Saving macros - tips for beginners
Starting with the 2007 release, Excel introduced a significant change in how it handles files, particularly concerning macros. Macros are essentially small programs written in VBA (Visual Basic for Applications) that automate tasks in Excel. To distinguish between regular Excel files and those containing macros, Excel uses different file extensions. A standard Excel file is saved with the extension ".xlsx", while a macro-enabled file, which can contain these VBA scripts, is saved with the extension ".xlsm". This differentiation is crucial for security purposes, as macros can be used to execute malicious code. Therefore, Excel provides warnings to users when opening macro-enabled files to prevent any unintended security risks.
If you're working on an existing Excel file that's a regular file (with an .xlsx extension) and you decide to add macros to it, you'll need to save it as a Macro-Enabled Workbook. This ensures that your VBA code is preserved and can be executed when the file is reopened. To do this, when you're ready to save your file, you should select the 'Save As' option. In the dialog box that appears, look for the 'Save as type' dropdown menu. Here, you will find various file type options, and you should choose 'Excel Macro-Enabled Workbook (*.xlsm)'. This action changes the file format to one that supports macros, keeping your code safe and executable within the file.

VBA Excel: Making macros available on all workbooks

Creating a macro in your Personal Macro Workbook is an easy process, which you can do by following these steps:
- Begin by clicking on 'Record Macro.' You'll find this option either in the Developer tab or in the Status Bar. If the Developer tab isn't visible in your Excel, you'll need to enable it first to access more advanced features like macro recording. (To make Developer tab visible, you can check our How to display the Excel Developer tab for using advanced features page.)
- When the Record Macro dialog box opens, look for the option 'Store macro in.' From the dropdown list, select 'Personal Macro Workbook.'
- After selecting where to store your macro, click the 'OK' button to start the macro recording process.
- If you don't actually need to record any specific actions and just want to create the Personal Macro Workbook, you can immediately click the 'Stop Macro' button. This action will create the workbook without saving any specific macro actions.

After you stop recording the macro, Excel automatically generates the Personal.xlsb file. If you want to view or work on this file, you have two options: use the 'Unhide' feature to make it visible on your Excel interface, or open the Visual Basic for Applications (VBA) window to access it from there.
To add more macros or edit existing ones in the Personal.xlsb file, simply write your macros directly into it. Once you've made your changes or additions, remember to save the file while you're in the VBA window to ensure your macros are stored and available for future use.
Recording a macro as a cheat sheet

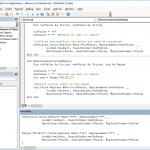
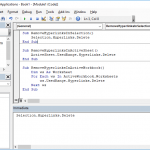
When you perform actions in Excel, especially when recording macros, these actions are typically applied to the cells you've selected. For instance, if you're changing the cell color, you're interacting with the cell's 'Interior' and 'Color' properties. This process is not only useful for achieving your immediate task but also serves as an insightful way to learn more about VBA's functionality in Excel.
For beginners looking to understand the mechanics of VBA in Excel, observing how recorded actions translate into code is a great learning tool. It reveals the underlying properties and methods used in VBA, providing a clearer picture of how Excel's VBA environment operates. This approach is particularly beneficial for those aiming to streamline their Excel workflows and automate repetitive
Assigning shortcut key to an existing macro
Assigning keyboard shortcuts to macros in Microsoft Excel is a convenient feature that enhances efficiency and ease of use. Whether you've recorded a macro, manually typed one, or even copied it from another source, you can easily set a custom shortcut key to activate it. This process involves a few simple steps:
- First, enable the Developer tab on the Excel Ribbon, a key step for accessing advanced features in Excel.
- Once the Developer tab is active, click on 'Macros' to view the list of available macros in your workbook.
- From the list, select the macro you wish to assign a shortcut to.
- After selecting the macro, click on 'Options.' This opens a dialog where you can configure additional settings for your macro.
- In this dialog, you'll find a field labeled 'Shortcut key.' Here, input your desired character. Excel will then create a keyboard shortcut combination based on the character you choose.
- Finally, click 'OK' to confirm and assign the shortcut key.
By creating keyboard shortcuts, you can streamline your workflow in Excel, allowing for quicker access to and execution of your most commonly used macros, thereby boosting productivity and efficiency in your Excel usage.

Immediate Window - tips for VBA beginners
The last tip for VBA beginners in Microsoft Excel revolves around a useful tool in the VBA editor known as the Immediate Window. This small editor, found at the bottom of the VBA screen, is an invaluable asset for anyone learning to code in Excel's VBA environment. If you don't see the Immediate Window, simply press Ctrl + G, a shortcut that brings it up instantly.
The Immediate Window serves as a quick testing ground for your VBA code. It's perfect for running single lines of code to observe immediate results or for inspecting the properties of objects during the debugging process. This feature is particularly helpful to troubleshoot issues efficiently.
For instance, if you're working with cell formatting in Excel VBA, the Immediate Window allows you to quickly check a cell's color and find its VBA code equivalent.

As an alternative way in Excel VBA is to directly output information from your code into the Immediate Window using the Debug.Print command. This method allows you to display values or results of your code in real-time, which is especially helpful for debugging and understanding how your code is functioning.
For example, if you want to see the value of a variable or the result of a function while your code runs, you can insert the Debug.Print command followed by the variable or function name. This will print the current value or result to the Immediate Window in the VBA editor, providing you with immediate insight into your code's behavior.